

How to Make An Apron
Project Level: Easy

About Fabric Love
Established in 2015, we are a small, independent fabric shop in Colchester, Essex, UK dedicated to providing our customers with great quality, affordable fabrics along with fabulous customer service and super fast delivery!
With a combined wealth of over 50 years sewing experience between us, we have a real passion for what we do and enjoy sharing our love of sewing and crafting with our lovely customers!
Utility aprons are useful for all types of activities including gardening, sewing, cleaning and for those teaching young children in the classroom or crafting at home.
This apron has two large pockets and measures 40cm x 73cms with the belt measuring 147cm x 4cms. The pattern can easily be adapted to make a smaller apron as the pattern pieces consist mostly of rectangles. We used a Little Johnny cotton print to make this gardening themed apron.
You Will Need
- Half a Metre of Wide Cotton (50cm x 150cms)
- Bias Binding 25mm x 2m
- A Sewing Machine
- Iron & an ironing board
- Sharp scissors, pins, corresponding coloured thread
Recommended Fabrics & Notions
Instructions
Download the PDF pattern. Print the pattern ensuring you do not check the box on the print dialogue that says "Scale to Fit" or "Fit to Page" and check that the test box has printed at the correct size of 5cm.
Step 1.
Starting with the pocket, iron a 1cm hem onto the wrong side of the fabric and sew the bias binding on the top of the pocket on the same side.
Mitre the corners, (trim the corners at a 45 degree angle) this reduces the bulk in the seams.
Press the fabric along the bias binding and fold the ends in so there are no raw edges. Fold the the excess bias binding over and stitch.

Step 2.
Place the pocket centrally onto the main body of the apron, I managed (with a bit of Jiggery-pockery) to pattern match it but it made my pocket a bit smaller.
Stitch the sides and the bottom of the pocket.
Measure to find the centre of the pocket and stitch a straight line reinforcing the top of the pocket.

Step 3.
The same as step 1, sew the bias binding onto the bottom and sides edges of the wrong side of the main body of the apron.
Leave excess at the corners as this will allow you to make a tidy fold.
Press the fabric.


Step 4.
To make the belt, press the fabric and fold it in half, right side up.
Turn a hem on each side ensuring that they are even.
Step 5.
Fold the belt in half & align it to the central pocket stitching. Pin and top stitch all around the top.
Press firmly.
Right, I'm off to find my gardening gloves..


Related Tutorials

Reversible Lantern Shaped Lunch Bag
This lantern shaped lunch bag has lots of space inside, it is semi structured, machine washable and reversible! The box and knife pleats create a beautiful shape. The finished bag is 15cms deep and at it's widest point has a circumference of 84cms. What's not to like?

How to Make Trousers Easily - No pattern required!
Fancy whipping up a new pair of trousers in an afternoon? This tutorial shows how to make your own pattern for palazzo pants or harem pants super quick and just as easy!
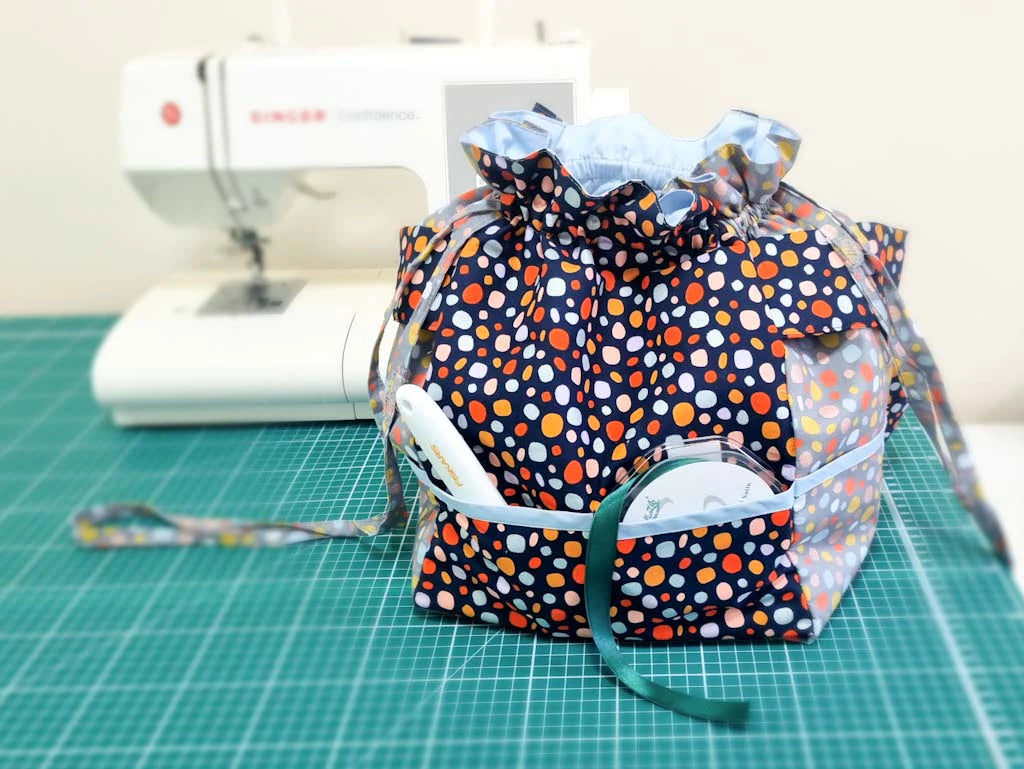
How to Make a Pocket Crazy Craft Bag!
A Pocket Crazy Craft Bag... with how many pockets? As many as you like! I managed to make twenty-six of them in various sizes.This is perfect for crafters on the go! It's a standing joke in my family that I can't go anywhere without a crochet hook, several balls of wool, a sewing project and a notebook to write down the creative ideas that explode in my head!What can I say? I'm a crazy lady with crazy ideas and I love pockets in bags!This is a cubed bag that measures 36x49cms, it has a double drawstring closure, two handles and it can be worn over the shoulder. It has been interfaced with Heat & Bond to give it structure and it has a big space in the middle for your latest creation in progress.The pockets are various sizes to hold everything from scissors to bodkins, patterns to pins and the occasional bar of chocolate...you know, for emergencies...Ready?
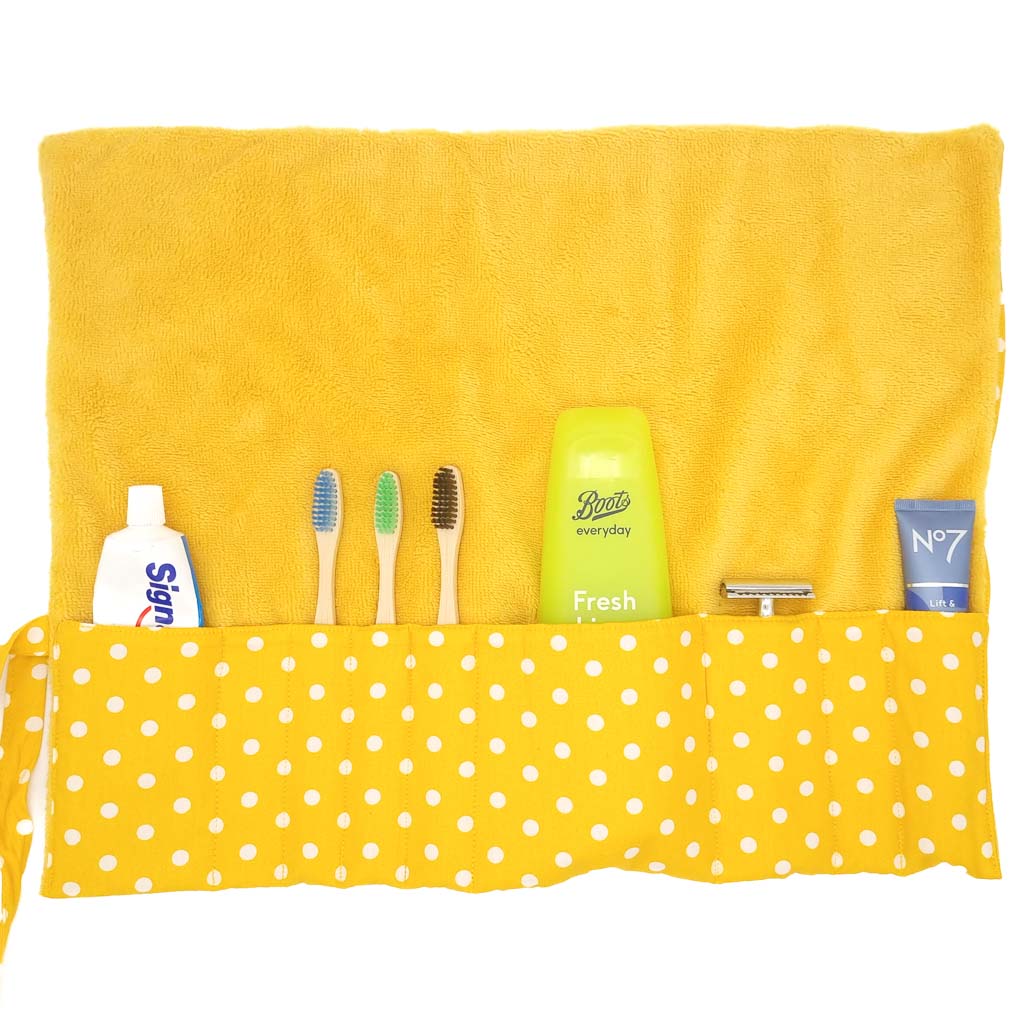
How to Make a Toiletry Wrap
Make a reusable, washable toiletry case with environmentally friendly bamboo towelling. Requires a fat quarter of towelling and a fat quarter of cotton fabric.