

How to Make an Art Caddy Storage Bag

Project Level: Medium
The caddy is made up of ten rectangles, five for the outside of the caddy and five for the lining (two bases, four large sides and four smaller sides).
My demonstration caddy was made with a bright and funky fabric bundle from our great range of fat quarter bundles
Most fat quarters measure 50x55cms as a roll of fabric is 110 cm's wide.
|
You will be making a box out of fabric. I have started with the inside of the caddy first, this might sound the wrong way round but if you are new to sewing, haven't sewn for a while or need to find your sewing mojo, it's about building confidence and any mistakes, wobbly stitching etc will be on the inside. |

|
You will need:

One fat quarter bundle, lightweight fusible interfacing and thick fusible interfacing.
A sewing machine, scissors or a rotary cutter, an iron, ironing board, pins, a ruler and corresponding colour thread.
Tips & Tricks:
Make sure your fabric is the right way up if it has a pattern. Upside down spots are fine but upside down rainbows look odd... I made a Christmas stocking once with upside down penguins... It's a learning curve.
Trim any loose threads as you sew each piece.
When you start sewing use the reverse function on your machine for 10 mm or so then continue going forwards. Repeat this when you approach the end of your stitching. This stops the threads unravelling when you trim them.
When you sew a pocket onto material makes sure that the opening is the right way up. Again, learning curve.
I pre cut all of my pockets and laid them on the inner and outer fabric to see what it looked like, to make any changes before I sewed them on. I pressed the all at the pockets at the same time.
It might seem tedious to pull the iron out of the cupboard of doom (we've all got one) and dust it down to press the pockets, seams etc. but it will give your project a professional finish. The iron only comes out when I'm sewing. Our youngest daughter, aged five, asked what it was as she hadn't seen one before....
Instructions:
|
Decide which fabric you want to use for the inside/outside of the bag. I used different patterns because I liked the look of it. Take one fat quarter and cut two straps for the handles from the widest part of the fabric (55x10cms). Cut the remaining rectangle in half. These will make two large sides of the caddy. |

|
| Cut two smaller sides 14x30cms. |  |
| Cut one base 29x14cms. |  |
|
Use the pieces as a template to cut out one more base, two smaller sides and two larger sides. You should have two bases, four large sides, four smaller sides and two handles.
|
 |
|
Lay the pieces out in a "flat box" shape.
|
 |
|
I placed the pockets on the pieces to help to decide where I wanted them to go. It's easier to visualize what the finished article will look like. |
 |
|
You are going to start with the inside of the caddy and make your first pocket. Cut a piece of fabric 13x10cms. fold the top edge over twice to avoid a raw edge and press firmly. Stitch this hem in place. With your fabric the right side down fold the three remaining raw edges in and press. Pin to the lining and sew it on.
|
 |
|
Your second pocket: Cut a piece of fabric 18x12cms. Fold the top edge over twice to avoid a raw edge and press firmly. With your fabric the right side down fold the three remaining raw edges in and press. Sew a line across the top. Pin to the lining and sew it on. |
 |
|
Third pocket: Cut a piece of fabric 12 x10cms. Press as above. Sew a line across the top. Pin to the smaller side of the lining and sew it on. |
 |
| You should now have three pockets! | |
|
The next pocket has three sections. Cut a piece of fabric 23x14cms. Fold the top edge over twice to avoid a raw edge and press firmly. With your fabric the right side down fold the three remaining raw edges in and press. Sew a line across the opening. |
 |
|
Take a second piece of fabric 19x20cms and fold it into three sections. Press firmly.
|
 |
|
Cut another piece of fabric to make binding 19x6cms. Fold it in half lengthways and press. Open the binding and fold the outside edges to the centre, press firmly.
|
 |
|
Trim 5mm from each end of the binding. Place the binding over the lower raw edge. Stitch in place. |
 |
| Fold the top raw edge over twice to seal it. Pin and stitch in place. |  |
| Fold the raw side edges to the back, pin in place and stitch it to your previous pocket. |  |
| It should look something like this. |  |
|
Pin your triple pocket to the lining and stitch on leaving the top open.
|
 |
|
The inside of your caddy is complete and if you were feeling brave you should have six pockets! Put the pieces to one side and then you are ready to start on the outside of your caddy. |
 |
| Outer Caddy | |
| Again, lay your caddy pieces out as it's easier to visualize the what the finished piece will look like. |  |
|
I laid my pockets on but I will detail each step at a time. When you have made the caddy once and are feeling more confident, you might want to lay the pockets on too. You may have noticed that the intended pockets are wider than the side panels, this is because when you sew the up the sides of your caddy they will be secured by the seam. |
 |
|
Side panel. Cut two pieces of fabric, 17x21cms & 17x16cms. Fold the top edge over twice on both pieces to avoid a raw edge and press firmly. Pin and hem separately. |
 |
| Lay the two fabric panels on the side piece of the caddy, line up the bottom of the fabric, pin and stitch close to the bottom edge. This will secure the bottom of the pockets. |  |
| When the bottom has been stitched in place, use the pins to secure the top of the pockets. This will keep them straight and prevent them from flapping around when you stitch the outer caddy together. |  |
|
Second side panel. Cut two more pockets 16x11cms. Fold the top edge over twice on both pieces to avoid a raw edge and press firmly. The top pocket will need to folded and pressed on the bottom as it will be sewn to the side panel. Pin and stitch. As in the previous step, pin the top edges to keep them in place. |
 |
|
Caddy Front |
 |
|
Cut a rectangle 15x31cms. Turn the top and hem. |
 |
| Cut a piece of fabric 13x12. |  |
| Fold the insides of the pocket and press. |  |
| Stitch onto the larger pocket |  |
| Stitch the larger pocket onto the front panel along the bottom panel. |  |
| Measure half way across the large pocket and mark with pins. Stitch in place vertically creating two more pockets. |  |
| It should now look like this. |  |
|
Cut another rectangle of material 31x7cm. Turn a hem and stitch. |
 |
| Pin to the front of the caddy and stitch along the bottom edge. |  |
| Divide the top pocket into 4 equal sections using the central stitch on the previous pocket as a guide. |  |
| Stitch three lines which will create four more pockets. |  |
| It should now look like this. |  |
| Caddy Back |  |
| Cut two rectangles 20x21 and round the top two corners. |  |
| Place them the right side to right side and pin. |  |
| Stitch around three edges leaving the bottom open. Trim the sewn edge (this reduces the bulk on the seam). | 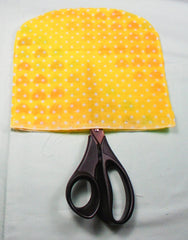 |
| Turn the right way round and press. Fold the raw edge in, pin and sew. |  |
| Press the hem. When you have done this fold the fabric into three equal sections to create a pocket with a flap. Press. |  |
| Cut a piece of fabric 31x14 cms. Fold the hems over. press and stitch a hem across the top. |  |
| Pin your flap pocket to the larger fabric. |  |
| Sew along the two short sides and the bottom of the flap pocket leaving the top open. |  |
| Pin the large pocket the back of the caddy and stitch along the bottom edge. |  |
|
It should look like this. place this piece with the other outside pieces. |
 |
| Handles |  |
|
Take your previously cut handles and fusible fleece. Following the instructions on the fusible fleece, iron it on to theWith the fabric the right side down, wrong side up, iron on the fusible fleece following the fleece instructions. This will give your handles structure.F |
 |
| Fold the wrong side in and press in half lengthways. |  |
|
Fold the outer fabric in and press. Its a lot of ironing but it the end result will be worth it. |
 |
|
Stitch along the long edge. You've guessed it... press. But don't they look great? |
 |
| Outside of the Caddy Construction | |
| Take the outside caddy pieces and the thick fusible fleece. |  |
|
Cut the thick fusible fleece one centimetre smaller than the outside pieces. Do this for the front and back panel, both sides and the base. Following the instructions on the fleece, iron it onto the wrong side of each panel. |
 |
| Lay the pieces out in a "flat box" shape. |  |
| Take a side panel and and the back panel. |  |
| Place them right side to right side ensuring your pieces are the right way up. |  |
Sewing Tip:When sewing bulky pieces, change your usual sewing foot to a zipper foot. Start in the bottom corner and sew along to the top of the caddy. |
 |
| Place the base of the caddy right side to right side and starting at the previous seam, sew along the base. |  |
| Take the remaining side panel and place it right side the right side on top of the back panel. Stitch from the base to the top. |  |
| It should look look like this. |  |
| Place the front panel right side to right side. Pin the bottom of the front panel to the base of the caddy. Stitch a across the base. |  |
| It should now look like this. |  |
|
Pin the side panel to the base and stitch between the existing seams. Stitch from the corner of the base to top of the front panel. It should look like this. |
 |
| Repeat the last two steps. | |
| You should now have a four sewn sides and a base. Trim the inside seams (this reduces any bulk). |  |
|
Turn your caddy the right way round and trim any loose threads. Trim the top if you need too to ensure the caddy is level. It looks amazing!! |
 |
|
Use a ruler to measure approximately 6cms from each side of the caddy and pin one handle to the outside of the caddy. Repeat for the other handle and place your caddy to one side. |
 |
| Caddy Lining | |
|
Again, lay out your pieces in a "flat box" shape. Change from the zipper foot back to the walking foot on your sewing machine. Follow the same instructions as you used to sew the outside of the caddy, leaving one long side of the base open (this will be used to turn the lining the right way round). This will be easier to sew as there is no thick fusible fleece to contend with! |
 |
| It should look like this. |  |
| Pull the lining onto the caddy, right side to right side ensuring your seams are aligned and pin. Trim any long sides so the top is level. |  |
| Sew around the top. | 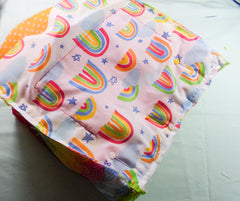 |
| Remove the pins and pull the outside of the caddy through the hole in the bottom of the lining. |  |
| Pin the raw edges together and stitch. Trim any loose ends. Push the lining into the caddy. |  |
|
Almost there!! Grasp the the top of the bag and firmly push the lining down. Pin around the top of the bag. Stitch along the top of the bag. |
 |
|
Tada!! You did it!! Show your completed project off to as many people as you can and fill it with lovely things! |
Leave a comment